If you don't already know Instagram is an app that helps you take great looking photos every type by using your phone's camera combined with some creative photo filters. The net result are superb looking, artistically styled photos. Instagram can take just about any photo and turn it into a work of art.
Step 1.
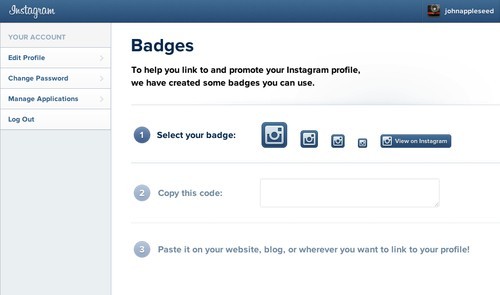
To create an Instagram badge the first thing you'll need is an Instagram account. You can sign up for a free Instagram account by clicking here. If you already have an Instagram account you'll want to login and go here.
Step 2.
Instagram provides a few different sizes and types of badges you can put on your site. Choose the one that best fits your site. Once you do that you'll see some HTML code will appear in the box below where you selected the size. Right click and choose copy. The code will be copied to your computer's clipboard.
Step 3.
Login to your WebStarts account. If you don't already have one you can create one by clicking here. WebStarts is a free way to build a website so there's nothing to lose. Once you're logged into your WebStarts account choose to edit the webpage where you'd like to add the Instagram badge.
Step 4.
Click on the "Insert > HTML" option while in the WebStarts page editor view and then paste the code from your clipboard into the area provided and click "Ok". You'll now be able to drag and drop your Instagram where you'd like it to appear on your webpage. Click save and your page will be published to the web complete with your Instagram badge proudly displayed on your page.
Stay tuned for more helpful articles on how to build and market a great looking website from WebStarts.com.
